For some time now I’ve been harbouring a growing itch to start experimenting with quilting. It’s a form of design and sewing I’ve never tried, and recently got more and more exposed to it, starting with related Pinterest search results, this inspiring blog I stumbled upon, and just random items I started noticing, online and also in real-life.
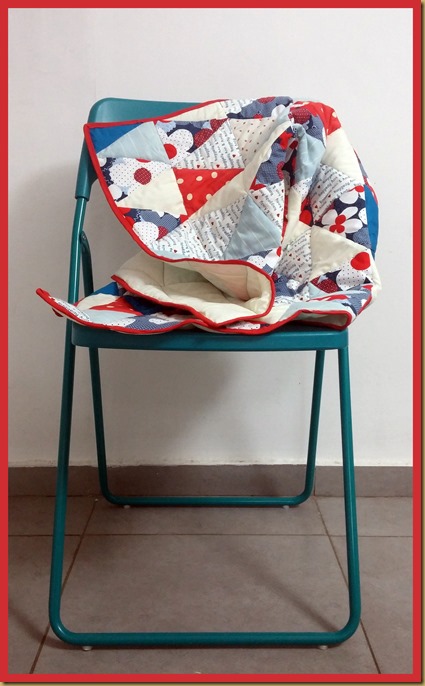
So, after it was nesting in me for a while, two months ago I got my chance to try and quilt something. I decided I’ll sew a quilted baby blanket for my newest family member soon to be born. Now that he is all born and healthy (Mazal-Tov cute new nephew!), and I’ve given the present, I can finally share the process and the results here.
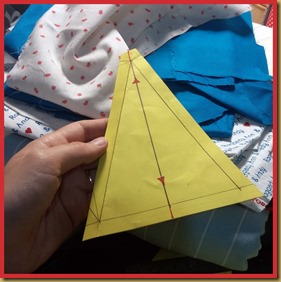
A baby’s blanket was just what I’ve been waiting for, since it is quite small in size and fits a first attempt at quilting. But, because it’s me, of course I had to upgrade at least a tiny bit, and not to settle for the big-square-blocks frame of a normal person. I decided to go with triangles. Lots and lots of small triangles. I scribbled a pattern (basically an Isosceles triangle), while waiting for Idan to come back from the store with a shiny new rotary cutter (my first!). Then I started brutally cutting through a pile of blue and red leftover fabrics I had. It was tiresome, but the rotary cutter was a very good investment that saved me lots of time.
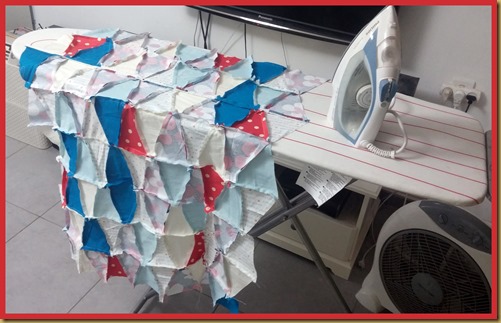
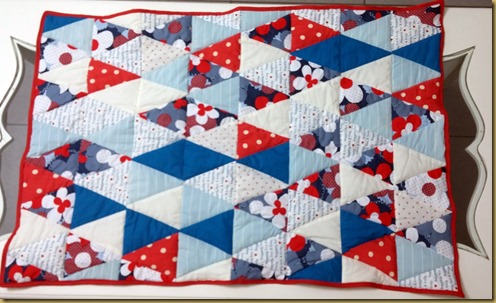
When all of the cutting was just about done, came the mind-boggling phase of mixing and matching the parts. This took me a while, and also sent me back to the cutting board to better balance the colours some more, after which came the relaxing sewing phase. Eight rows of thirteen triangles each later, I was almost done.
I cut a backing fabric, and an Acrilan middle layer, and started sewing them together to the front, not before ironing the whole patchwork to make it nice and flat. Then came the top stitching, which gave the blanket a real puffy and nice look.
The whole process went surprisingly smooth. The mix-matching step was harder than I expected, and I wasn’t sure the combination looked remotely fine until it was sewed, and everything suddenly received shape. The one problem I did face was at the top quilting phase, as the sewing machine kept pulling the layers unequally and forced me to nip some parts. From the little I read online I got the impression that this is a common problem in quilting, and I guess purchasing a walking-foot would help, but it is very expensive and I’m not even sure it would do the job. A walking foot for my 215 Bernina would cost almost as much as a whole new (-yet cheaper and smaller, maybe even second hand-) sewing machine.
All in all, this took about a week of evening work (and a small while later, another evening for sewing the binding). It measures about 70 by 100 cm, and contains 106 triangles. And the most important part: it left me wanting to quilt again.


Pingback: Hold the press! | Flies in my eyes
Wow, thanks for the shoutout! This quilt is adorable.
As for the walking foot, and almost all of the other quilting kit I have, it took me a while to gather the quality stuff. When I first started sewing I didn’t know if I’d like the whole palaver, so I started off by asking on Facebook who had a sewing machine gathering dust and it was no surprise that someone did. I eventually bought a newer machine, but it turned out to be really unsuitable for quilting (too small, no needle up-down function, etc.). It did take two years from the time I started sewing until I got a proper “quilting” machine, and in relative terms it cost a fortune that I couldn’t really afford at the time, but don’t for a second regret.
My first rotary cutter was also a cheapie – whatever was available in my local ghetto craft store. I lucked out on a very cheap, large self-healing cutting mat on Amazon, but it only has metric markings, not inches, which is the measurement all my rulers have. Both did the job I needed them to do, and I still use the same cutting mat.
I wouldn’t splurge on the expensive stuff until you’ve fixed upon quilt-making as something that you’re going to do regularly. Once you’ve decided the bug is there to stay, it’ll be false economy not to get a walking foot – the difference it makes to quality and appearance is remarkable – or other higher-quality kit. I have a few recommendations if you need.
Thank you for the thoughtful reply. I would love to hear recommendations from you. The more I search and explore regarding quilts, the more I realize I know absolutely nothing about this art form. And I don’t really have anyone to guide me, since quilting is not common in Israel. Also, If we could write in Hebrew it also help 🙂
About the walking foot: what other options do I have to secure the quilt’s proportions? Would a simple staple stitch do the job?
Thanks again!